Friday, October 28, 2011

Dreadfleet Part 2: Game Genie(s)

Thoughts and tips on the latest mega-box from Games Workshop: Part 2. This article deals with the Araby-inspired ship: The Flaming Scimitar.


Warhammer Games Workshop Miniature Dreadfleet Araby Ship

This was the first time I was working with a ship with sails and they are a very different experience. It took some getting used to, but I found a couple things to help with the process as you're working on this set.


First off, you're going to want to paint the raised symbols on the sails before filling the rest. There are a lot of subtle shade and tint transitions to remain faithful to the box art. Even if doing your own thing, the raised areas are shallow, it's almost a given you're going to bleed off the raised surface onto the sail. Better to bite the bullet and make sure the symbols are correct before you proceed; they're going to command the lion's share of a viewers attention.


I highly recommend you find a foundation color for the sail itself. Filling in the areas around the symbols will be less painful with the superior coating of foundation or black.


Mask your contact areas and pre-fit every piece before gluing. This is a kit that has zero room for error; even a coat of primer will make it impossible for the joins to fit properly. I use a piece of kneaded-eraser to keep the contact areas clean during priming. It's cheap, reusable, and effective. 


And don't forget to keep painting those tokens.

Two ships in the Grand Alliance complete. Next up is the Swordfysh.

Friday, October 21, 2011

Dreadfleet Part 1: Dwarves!

Thoughts and tips on the latest mega-box from Games Workshop: Part 1. This article deals with an introduction to the box, as well as the Alliance ship: Grimnir's Thunder


Grimnir's Thunder Warhammer Games Workshop Miniature Dreadfleet Dwarf Ship

First off, this box is a monster. It's filled to the brim with jam-packed frames of ships, tokens, and islands. Each ship is designed with an insane amount of detail for it's scale, and the ships themselves are quite sizable. As each ship comes from a different background, it has a color scheme unique to it's origin. Add in the incredible game token designs and you have a box that demands you take your time.


Every ship has a completely unique look and style to it, so batch processing just isn't a viable option. The one thing I do recommend is that you paint the ship at the same time as you paint it's auxiliary. In game terms, the auxiliary is a smaller vessel that some of the main ships have to deploy that can perform different actions than it's mother craft. Some ships get a simple boat for an auxiliary, while others get something completely different, like the dwarves who get a zeppelin.

In this way, you don't have to go back later and try and match color schemes after having painted the main ship. I'm also including a single game piece with each main ship just so I don't get stuck with a monotonous load of work at the end.


WARNING: That innocent looking little aircraft is deceptively sharp. The prongs on the front actually got into my thumb just like a barb. Handle with extreme care.


That does it for now. Next week will be the Flaming Scimitar!

Monday, October 17, 2011

Ork Nob

Coolminiornot was running a contest for a single painted ork/marine/chaos marine, and I wanted to give it a shot. Here's the results.

Warhammer 40k Games Workshop Miniature Ork Nob

It's easily the best mini I've painted thus far, but it couldn't hold a torch to the masterpieces that are commonplace on that site. It's a little disheartening to have your work blown out of the water, but I don't paint for glory. Painting for competition is a different beast, and one I'm happy to leave be most of the time. Still, at least my friend got a nice Ork out of the deal.


Thursday, October 13, 2011

Kroxigor

I rescued this guy from a random bits box when I realized there was an entire Kroxigor just sitting there. It was fun to work with an older model and to breathe new life into an otherwise forgotten sculpt. The new Kroxigor's are beautiful, but this guy still holds up. I glued some temple guard bits onto his belt to add some bulk/interest.

Warhammer Fantasy Games Workshop Miniature Lizardman Kroxigor


Sunday, October 9, 2011

Bolter Betty: Day 6

On Day 6 I put all the final colors and effects in, finishing the project.

Warhammer Games Workshop Miniature Sisters of Battle Pinup Girl

I'll post a pic of the printed image on the wing of a valkyrie once my friend has that part finished.

Saturday, October 8, 2011

Bolter Betty: Day 5

On Day 5 I finished adding detailed objects and began the process of converting everything to color.


More tomorrow.

Friday, October 7, 2011

Bolter Betty: Day 4

Day 4 saw the finished product for the leg details, as well as Betty's right arm. I also worked on some better grenades, which is always a win.


More tomorrow.

Thursday, October 6, 2011

Bolter Betty: Day 3

Day 3 was all about shin armor. With any good pinup girl the legs are featured prominently, so I wanted to make sure I had an appropriate level of detail.


More tomorrow.

Wednesday, October 5, 2011

Bolter Betty: Day 2

Day 2 was spent getting the rest of the body in line and adding facial details.


More tomorrow.

Tuesday, October 4, 2011

Bolter Betty: Day 1

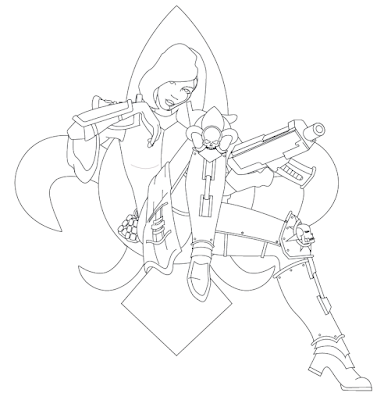
A Buddy of mine asked me if I would do a pin-up style illustration for the wings of a valkyrie he's been working on. He wanted her to be a sister of battle in full battle gear.

Thus, Bolter Betty was born.

The first day I spent getting the positioning and proportions right for the upper body.


More tomorrow.